FTP File Uploads
Use the FTP details shown in the IMDA portal to upload your prepared data files. Keep the password private and do not share screenshots that show the real password.
Step 1: Get FTP Login and Folder Details
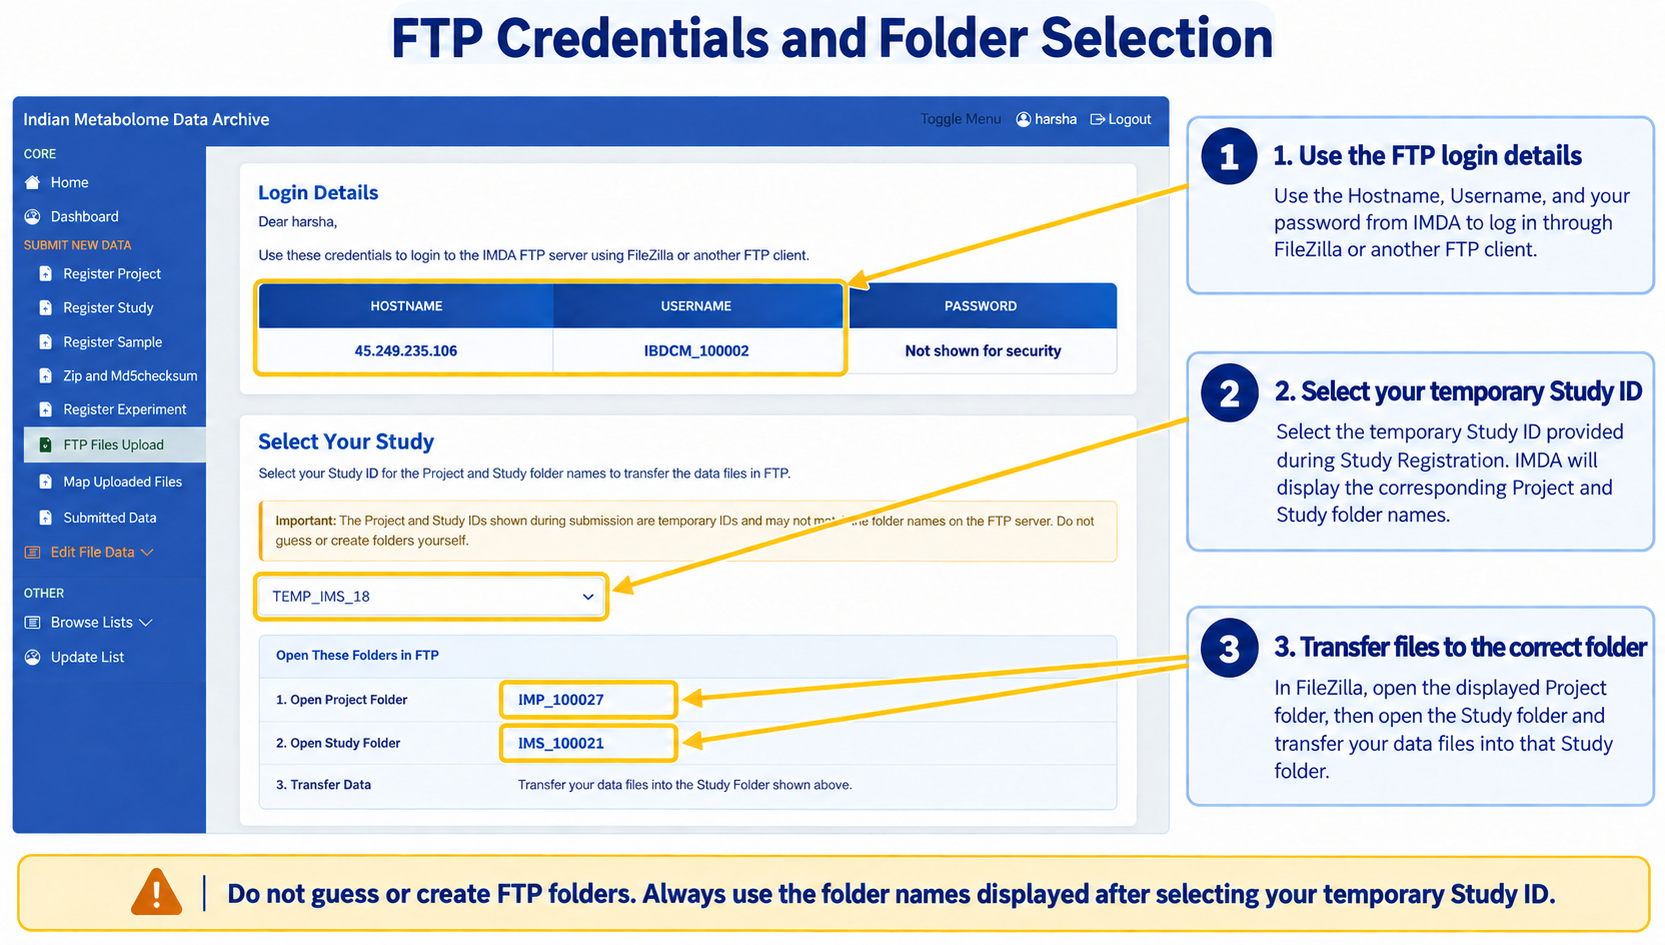
First open FTP Files Upload in the IMDA sidebar. This page gives the FTP login details and shows which project/study folder must be used for the selected study.
What to Check on the FTP Page
| Portal Item | What the User Should Do |
|---|---|
| Hostname | Copy this into the Host field in FileZilla or another FTP client. |
| Username | Copy this into the Username field. |
| Password | Copy this into the Password field. Do not share it in email, screenshots, or documents. |
| Study ID | After submitting the experiment form and template, open this dropdown and select the correct temporary Study ID, such as TEMP_IMS_XX. |
| Project Folder | After the temporary Study ID is selected, the portal displays its related Project Folder, such as TEMP_IMP_XX. Open this folder first in the FTP client. |
| Study Folder | The portal also displays the related Study Folder, such as TEMP_IMS_XX. Open this folder inside the Project Folder and upload the data files there. |
Use the Folder Names Shown in the Portal
Complete Register Experiment first. On the FTP page, select the correct temporary Study ID from the dropdown. IMDA will then display the matching temporary Project Folder and Study Folder created for that submission. Use these exact folder names in the FTP client; do not guess, rename, or create the folders manually.
Step 2: Upload Files in FileZilla
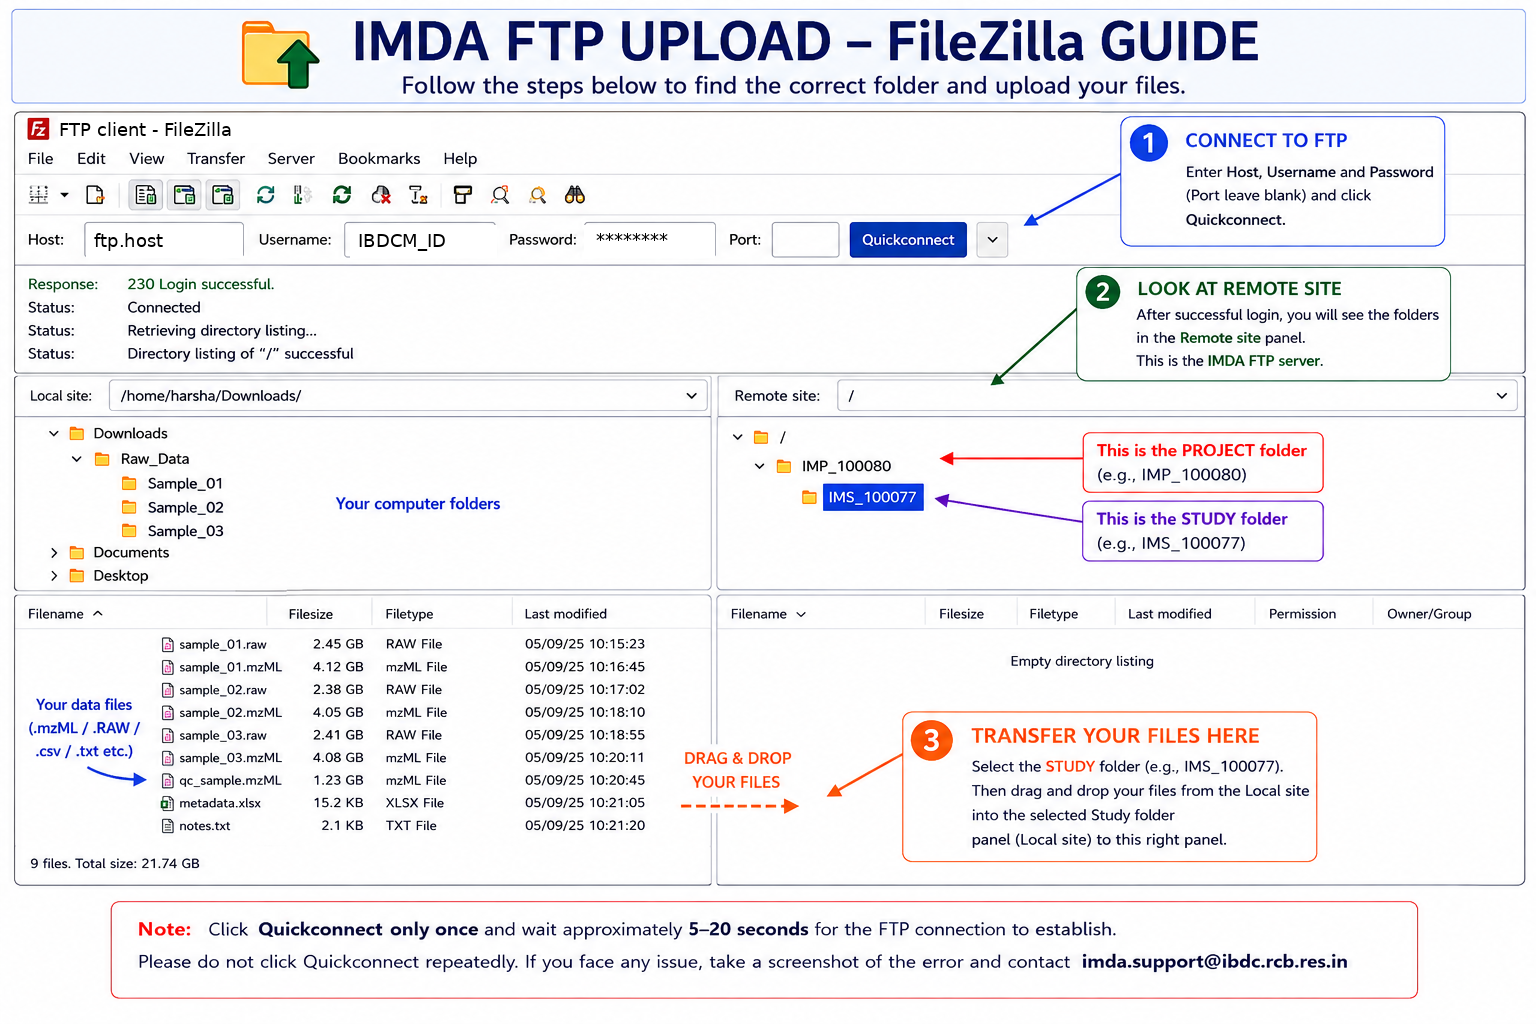
Use FileZilla to connect to the IMDA FTP server and transfer the final prepared files into the correct Study Folder.
FileZilla Procedure
- Open FileZilla or another FTP client.
- Enter the Host, Username, and Password exactly as shown in the IMDA FTP page.
- If a port is provided, enter it in the Port field. Otherwise, leave the port blank and connect normally.
- Open the Project Folder shown in the portal.
- Open the Study Folder shown under that project.
- Upload the final ZIP/raw data files into the study folder.
- After upload, continue to Validate Files in this SOP.
Before Upload
Generate the MD5 checksum after the final ZIP file is ready. Do not rename, edit, or recompress the file after MD5 generation, because the checksum will change.
After upload, continue to Validate Files. On that page, use Map Uploaded Files from the IMDA sidebar to check and validate the uploaded files.